

Oracle APEX plugins are a powerful way to extend the platform’s functionality, allowing developers to create custom behaviors, components, and validations tailored to specific needs. In this post, we’ll guide you step by step through the process of building an Oracle APEX plugin. By the end, you’ll have a strong foundation for creating dynamic, reusable plugins.
To make the learning process practical and hands-on, we’ll use the “Text Custom Validation” plugin as our example. This plugin validates user input to ensure it begins with a predefined prefix, combining both server-side and client-side logic to provide an efficient and seamless user experience.
Our step-by-step guide will cover:
-
The render procedure, responsible for generating the plugin’s HTML and integrating it into the APEX page.
-
The JavaScript logic, which handles client-side validation and interactivity.
For additional resources and the full source code, visit our website at Novoshore or check out the repository on GitHub. Let’s get started!
The first step is to create the plugin. To do this, navigate to your application and go to “Shared Components”. Within this section, locate and click on “Plug-ins”. Then, click on “Create” and select the “From Scratch” option to start building your plugin from the ground up.

The Oracle APEX interface for creating a new plugin, demonstrating fields for defining the plugin’s name, type, and associated procedures
When selecting the Item plugin type, as shown in the attached screen, you will notice the SQL Source text box displayed. In this area, you can work with various functions listed below the field.
The Render Procedure or Function Name is responsible for rendering the plugin. If you click on the question mark icon next to this field, you can view the required signature for the procedure or function to be callable by Oracle APEX.
Lets code:
We define the procedure signature as required and, in the declaration section (AS), we specify several variables in the following order:
-
l_result: This variable is of typeapex_plugin.t_page_item_render_result, which represents the structure used to render an APEX page item. It includes attributes for metadata, configuration, and output generated during the rendering process. -
l_item_name: This variable retrieves the name of the item as defined in the plugin interface. It allows us to dynamically refer to the item within the page. -
l_item_value: This stores the value currently held by the field in the APEX session state, ensuring synchronization between the server and the UI. -
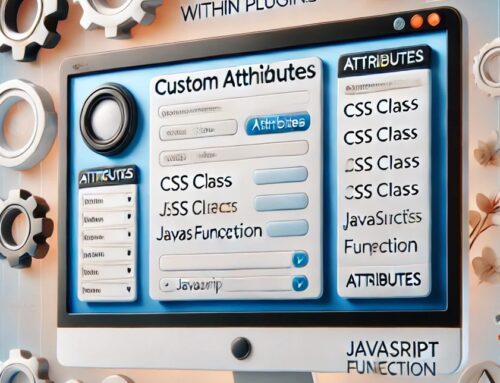
Custom Attributes (see more about custom attributes):
-
attr_short_text: Defined asp_item.attribute_01%TYPE, this variable retrieves the value of the first custom attribute, typically used as a short descriptive text or validation prefix. -
attr_label: Defined asp_item.attribute_02%TYPE, this variable retrieves the value of the second custom attribute, which is used to define the label for the input field.
-
-
l_html: Declared asCLOB, this variable is used to generate the custom HTML output for the plugin. It allows us to customize the field’s appearance and properties dynamically.
Once the variables are defined, we proceed with the foundational work. The first step is to establish the item’s value in the session. This is crucial for maintaining the state of the item and ensuring its value is accessible throughout the application’s lifecycle.
Setting the Session State
To set the session state for an item in Oracle APEX, use the following procedure:
-
l_item_name: The name of the item in the APEX application. -
l_item_value: The value you want to store for this item, typically the input provided by the user.
The apex_util.set_session_state procedure serves to Store the User’s Input, the value entered by the user into the field drawn in the interface is saved to the session state.
Build the HTML structure for the plugin output
Generating the correct HTML output for the plugin is essential because it ensures the plugin integrates seamlessly with Oracle APEX’s framework. The structure of the HTML must align with APEX’s form templates to guarantee compatibility with built-in features such as validations, dynamic actions, and error handling. If the HTML deviates from the expected structure, the plugin may lose key functionalities like proper display, user interaction consistency, or the ability to handle session state effectively.
Maintaining the correct structure also ensures that the plugin adheres to APEX’s visual and functional standards, providing a consistent user experience across the application. For example, using predefined classes like t-Form-fieldContainer and apex-item-text allows the plugin to inherit APEX’s styling and behaviors, while unique identifiers link the HTML elements to the backend. This careful alignment ensures that the plugin remains robust, reusable, and fully functional in any application where it is deployed.
Once the l_html variable contains the generated HTML, the next step is to output it to the page using htp.p. This procedure ensures that the dynamically created HTML structure is rendered as part of the application’s user interface. Without this step, the visual elements of the plugin would not appear in the browser, making it non-functional.
After printing the HTML, the final step is to integrate the plugin’s JavaScript functionality using apex_javascript.add_onload_code. This adds a call to the specified JavaScript function (e.g., textCustomValidation._initialize) when the page loads, enabling custom client-side behavior. By passing attributes like attr_short_text and l_item_name, the JavaScript is linked to the plugin’s HTML structure, ensuring full interactivity and functionality. These steps complete the rendering process, making the plugin visually consistent, interactive, and fully integrated with Oracle APEX.
The complete code would look like this:
In this first part of our series, we have laid the foundation for building an Oracle APEX plugin from scratch. We explored the key aspects of plugin creation, from setting up the render procedure and defining the session state to generating a structured HTML output that seamlessly integrates with the APEX framework. These elements ensure that our plugin is both functional and visually consistent with the platform’s native components.
This is just the beginning. In the next two articles, we will dive deeper into the remaining pieces: the JavaScript logic, where we will refine client-side validation and interactivity, and the server-side validation process, ensuring robust and secure input handling. By the end of this series, you will have a fully functional, reusable APEX plugin, equipped with the best practices to enhance your applications.
Stay tuned for the next installment, where we will unlock the power of JavaScript in our custom validation logic, allowing for real-time user feedback and advanced validation techniques.
For more information, please visit our company website, explore the plugin on APEX World, or check out the source code and documentation on our GitHub repository. Stay updated and feel free to reach out for support or contributions!


Leave A Comment